Search This Blog

Showing posts with label drawing. Show all posts

Saturday, May 22, 2021

How I start a painting in oil

My  Oil painting process


You know I really like working with oil. It's so easy to blend and soften edges and most important to me is the color I mix and put down on the canvas dries that color. Unlike acrylics which dry a value darker, and faster than oils. I still love working with acrylics, don't get me wrong. 

How I decide what to paint

First I decide on the subject. 
How do I feel about it. what is the mood? Why do I like this subject? Do I need to crop and decide to move objects to make a better painting? How much do I have to alter it and do I feel confident to make those changes? Before deciding even the color I work this out in a sketchbook.

This is the painting I wanted to do for along time. It's my grandchildren at the beach at sunset. They are very young and it's the first time to a beach. They lived in San Diego for a year and experienced so many new things. 


©️reference image for "Sunset Beach"


First question, What do I need to fix for a pleasing composition? I did some research on famous artist that I like. I found for me, they used the triangle most of the time in they're paintings. I think this would work wonderful for my idea. So I took the photo to the sketchbook. 

sketch work

I tried a couple of formats and ended up liking the square the best. If you look closely you can see how I divided the original photo up to maintain accuracy. 

I first, divide the photo from corner to corner in both directions after printing a small 2x3 or contact sheet size of the picture. This helps me to find center where I make a horizontal & vertical lines to place the shapes and they're relationships into my square format. I did end up removing the figure at the top of Kenna's head and moved the background figure to the right upper part of the painting to create the triangle composition in my final drawing. 
At this stage I also just focused on the black and white of the shapes. I wanted to see how my values would work in this format. Is it pleasing? How will I lead the eye through the painting? Where is my strongest focal point going to be? What is the most interesting? Does this format express the feeling I want to say?
Once I decided on these questions I had to decide on a color palette. I really loved the colors in the photo and I could express them even more in the painting. So I decided on a blue, orange and violet palette. 

My colors would be:
Titanium White- the work horse, cools and lightens value
Buff Titanium- a nice choice to lighten the color, gray it down slightly and change the value less than white
Cad Yellow medium- My warm yellow, blends and grays with it's compliment nicely
Yellow Orche- My warm golden yellow that has notes of brown. This makes a nice greenish color when mixed with blues, a nice warm blonde for hair color
Cad Orange - I could mix this orange but it is easier since I not only love this color, but will use it to create that sun glow through out the painting. Use sparingly on skin tones mixed with a red
Alizarine crimson- A nice darkish clear red, used to mix into a lavender for the under painting and shadows. This color is throughout the painting as a unifying color. Mixes well blues, orange and my yellow choice.
Quinacrodan Magenta- A clear rose red for skin tones and the darker hair colors. Makes clear shades with Burnt Sienna and Burnt Umber
Cobalt Violet- For an easy violet mixture that is on the coolish side. Also, easy to mix and is a convenient color to save time on my palette.
Cobalt Blue- A clear blue, that mixes well with the reds and oranges for beautiful grays.
Cobalt Teal- Another favorite I keep on my palette. Easy to mix, but since I like it so much this color works itself into my paintings much of the time
Burnt Sienna- Is a warmer brown that makes great skin tones and grays when mixed in small amounts of lavender.
Burnt Umber- A great color to aide in making darks. Almost like a black
Cool Gray- I use this also for convince if I plan to use grays in a painting. This unifies across the painting in cool tones and helps other colors gray down without mudding the color. 

I used Gamosol for my to clean paint off brushes during the painting process. To help dry the oils faster I used a walnut alkyd medium. I dipped my brush in this to keep the paint fluid and not to sticky. I clean my brushes with Turpinoid Natural. I could of changed the Gamosol to Walnut oil or linseed oil, which keeps the brushes clean and the paint fluid. It also reduces the faint smell of the Gamosol and is a healthier choice. I have tried to keep my materials as healthy as I can for painting. I found these be the healthiest choices out there. 

Next: How to draw your subject and transfer it to the canvas. This technique is useful for all painting processes including pastels. 


Wednesday, April 7, 2021

Lux paper review and planning the painting

 Lux paper review

Lux paper is white. It can take water, ink, acrylic under paintings. It is a sanded paper that feels very much like a 600 grit Uart paper. It can take dry application of pastel medium and the abuses with rubbing in the underpainting. It did not buckle on me at all. However, I did not soak the paper and only wet it with acrylic inks as much as necessary.

initial ink wash


I used Dewent intense sticks for this under painting. As you can see I used darker colors then I intended to finish with. My drawing is there, but not detailed. I tried to think of the darks that I wanted to make the finial painting sing on top of the darks. 

planning stage


Here you can see I worked out a lightly detailed drawing with value placement. To the right of this thumbnail I have written notes about my ideas for this piece. You will see in the end I did not add the cloud, although that can be done in another painting of this scene. I wrote the main color plan and other things like water conditions, warm and cool areas for possible color choices.  All these notations will give me some direction. As I initially draw in the big shapes I use my reference photo for the plan. I set it down at this point when I'm done and use the value study mostly during the painting process. I have the reference near by to refer to, but do not look at it much except to check cool colors against warms and small shape study. I also blurred my eyes to see the simple shapes in this initial blocking in of color. 

I started with my darks, but do make a small area of my lightest light. All color value use will always be affected by the color next to it. This dictates what color to use next to the sky, the trees and house. Initially I wanted to have the shadows in the house purple, but it wasn't working. I had to change it to a blue to get the effect I wanted. 

Also, note the soft and hard edges. I tried to use those lines to help direct the eye to the focal point. The porch next to the telephone pole. I also allow other areas of interest to the viewer in the house. The windows have on some harder edges but not really detailed. The trees are darker but take you through the color changes and edge treatment for the viewer to linger on. There can be more than one focal point in a painting. The other ones are supporting the main place that I want the viewer to see. 

11x11 "Summer Ranch"
See pastel page for sale price


I think I could of lighten up the picture better before posting. I'm finding that is necessary to get an accurate photo of the painting and it color. I will add that to this post later. I also should mention that the foreground is inviting the viewer into the picture with low value flowers and color notes. They're purpose is to invite you in to wonder around the house. Enjoy


Tuesday, March 30, 2021

Drawing the Light

Drawing the Light

 Keep light lines to define the light areas and heavier lines for the darker shadows. This helps the overall effect of the drawing. Simplify your shapes and the light vs dark patterns in you subject. Use hot pressed paper or Bristol board for best results with charcoal. A kneaded eraser is desirable to create soft areas and lost edges. It also is gentle to the paper. They make a white charcoal stick or pencil to help with highlighted areas on a toned surface. 

Portraits are often drawn in charcoal by the artist first, in preparation for the painting. This is called a grisaille, a drawing rendered in gray or neutral tones. Texture is achieved with mark making, scumbling, lost edges, line direction, curves and straight lines for energy. 

Surfaces

Today's artists have many surfaces to choose from. Although, some can be expensive don't save your best work for those papers. You should treat yourself to good paper, it frees up your expression to have a paper that can except multiple layers for drawing. 

 Canson Mi-Teintes paper to practice on, and this paper comes in multiple toned surfaces. Both sides can be used, there is the back side that is considered softer and the front side has more of a mechanical stamped pattern on it. This is great paper to practice your values, composition and color notes for a painting in an affordable manner. It is acid free so it can be used for finished work also. It's disadvantage is its inability to hold multiple layers of pastel. 

U-art, Pastel Premier, Pastel Mat, Lux and Art spectrum have more grit to them and are able to hold multiple thin layers of pastel which creates a luminous effect on your painting. These papers also have the ability to take an underpainting. This is any water based media, alcohol washes as long as the application is not thick (thick applications of paint clog up the rough surfaces). 

MDR & Watercolor paper & Archival mat board can be used if it is first primed with Gesso. The gesso helps to put a barrier between the wood and the paint helping it to last for years. Water color paper & Mat board should be coated as well, but a clear gesso applied to the paper produces a sanded like surface. Applications of this type would best be done with thin layers and finer brush strokes. To much texture will eat your pastels up, unless there is a specific affect you are wanting. Gesso ridges can also be sanded down some between applications to your desired finish product. This is especially important when using MDR board. This type of approach can help the artist save on expenses. 

There are still many types of paper that I have not mentioned. It's always worth mentioning to try out different papers and colors. Exploration is key to making better paintings. Always ask yourself "What if?" Never hold yourself back or feel like you need to ask permission. 

Tones

Your surface can be any color you want it to be. The color you choose may affect the mood and light of your work. It helps you to achieve contrast immediately, mostly used as a mid-tone value in a painting, allowing the artist to see the lights and dark patterns early. You will also create a consistent color harmony through out the piece if you allow the tone to show in places. The darker the paper, the more contrast in the light areas will be produced. On black paper all colors you put down appear lighter. This has a definite influence in the mood or light of the piece. Work with opaque and transparent applications in the media of your choice. Try out different warm or cooler colors on top of the underpainting to evaluate how the light and shadows effect the work. 

I have found for me, to identify the dark notes first and follow with at least a note on the lights. I define these areas first so I am careful not to overshoot these values as I paint. This helps me to stay true to my plan. I don't necessarily have to finish these areas, just stating where on the value scale I want to key the painting. Sometimes, I have a goal or look I want to experiment with, sometimes it's about the color relationships. What ever I think I want to do, I want to give myself a head start to get it right. 

Below, is a partial example using darker paper color allowed me to keep my lightest values in the midrange section of my pastel tray. The lightest values are not white but filled with color. The full painting of this little cowboy is framed without mats and is much brighter than this picture. He was practicing with his brothers and friends (dad was in the bleachers) at the Hollister rodeo grounds. One of my first portraits,  it currently sits on top of my mantle in the living room. 

Full sheet Canson dark blue


Tuesday, March 23, 2021

How to Bring a Painting Together

 Ride to summer camp

14x20 

The photo reference I used for this piece was taken about 30 years ago. As a family we planned a trip with 5 of our horses and the kids. Troy brought a friend. We went for about 1 week into the Emigrant Wilderness next to Yosemite. This particular photo was taken by my son across an open meadow high up on the trail. The picture itself was not the best to use but did give me the sense of our crossing it. I remember it was warm, and there was plenty of Lupin flowers growing in the open. We sometimes would come across others hiking but this high up it was rare to cross someone else. My daughter and I rode, Nile rode off and on and gave the 2 boys a chance to ride at times. We went back into that country 14 miles. Mostly, followed lakes and would stop to camp and fish often. It is a wonderful memory for all of us. I rode taxi who was a huge red spotted leopard Irish thoroughbred, Wendi rode pokey, a well built quarter horse from Poco Bueno bloodlines. CJ and Buck carried our gear, Classey was ridden by Nile. 

I look back on this photo and a few others from that trip with fond memories. All the horses have since passed on, kids grew up and moved away and Nile and I divorced. So that life is gone. I do miss all those things we did. 

How did I get this all put together? I stared at this photo for years, knowingly that I longed to paint it but not quite sure what to say about it. So it stewed and stewed.

It's important to understand what attracts you to a scene or photo. What does the piece want to say? What kind of mood do you want to give the piece? For me this was about not only the beauty of the back country, but the quiet that comes with it. This is what it was like for the first settlers to come into California or the Indian tribes that dominated the area. 

So I started with line drawings. I did this to work out the flow of composition. I knew basically what I wanted it to say. 

As you can see I chose the vertical format. The important things for me about this scene is the majestic canopy of trees we were riding under. Thats what was important to me. All trees in the forest take years even hundreds of years to reach some of these heights. As a group of people that automatically becomes a focal point. I represented this as a square shape and made sure all lines lead to this shape


By doing this first, I have saved myself steps in the painting process, the planning process and I hope a successful piece. 


Next I examine the shapes. All shapes are divided by light and dark. Only these two things are considered. I am checking to see how the shapes connect to each other, are they pleasing shapes, and are they boring shapes? This is one point to make design changes in your planning process. This is your notan. It is the foundation that your painting will develop from. Each painting MUST be evaluated this way until it becomes a habit and can be seen without working out all these steps. In the beginning however, you must include all the steps to see design. Remember NO DETAIL at this stage of planning.

Ask your self; Do my shapes connect or is it spotty? How can I join these lines? 
Next ask yourself; do these shapes feel balanced?


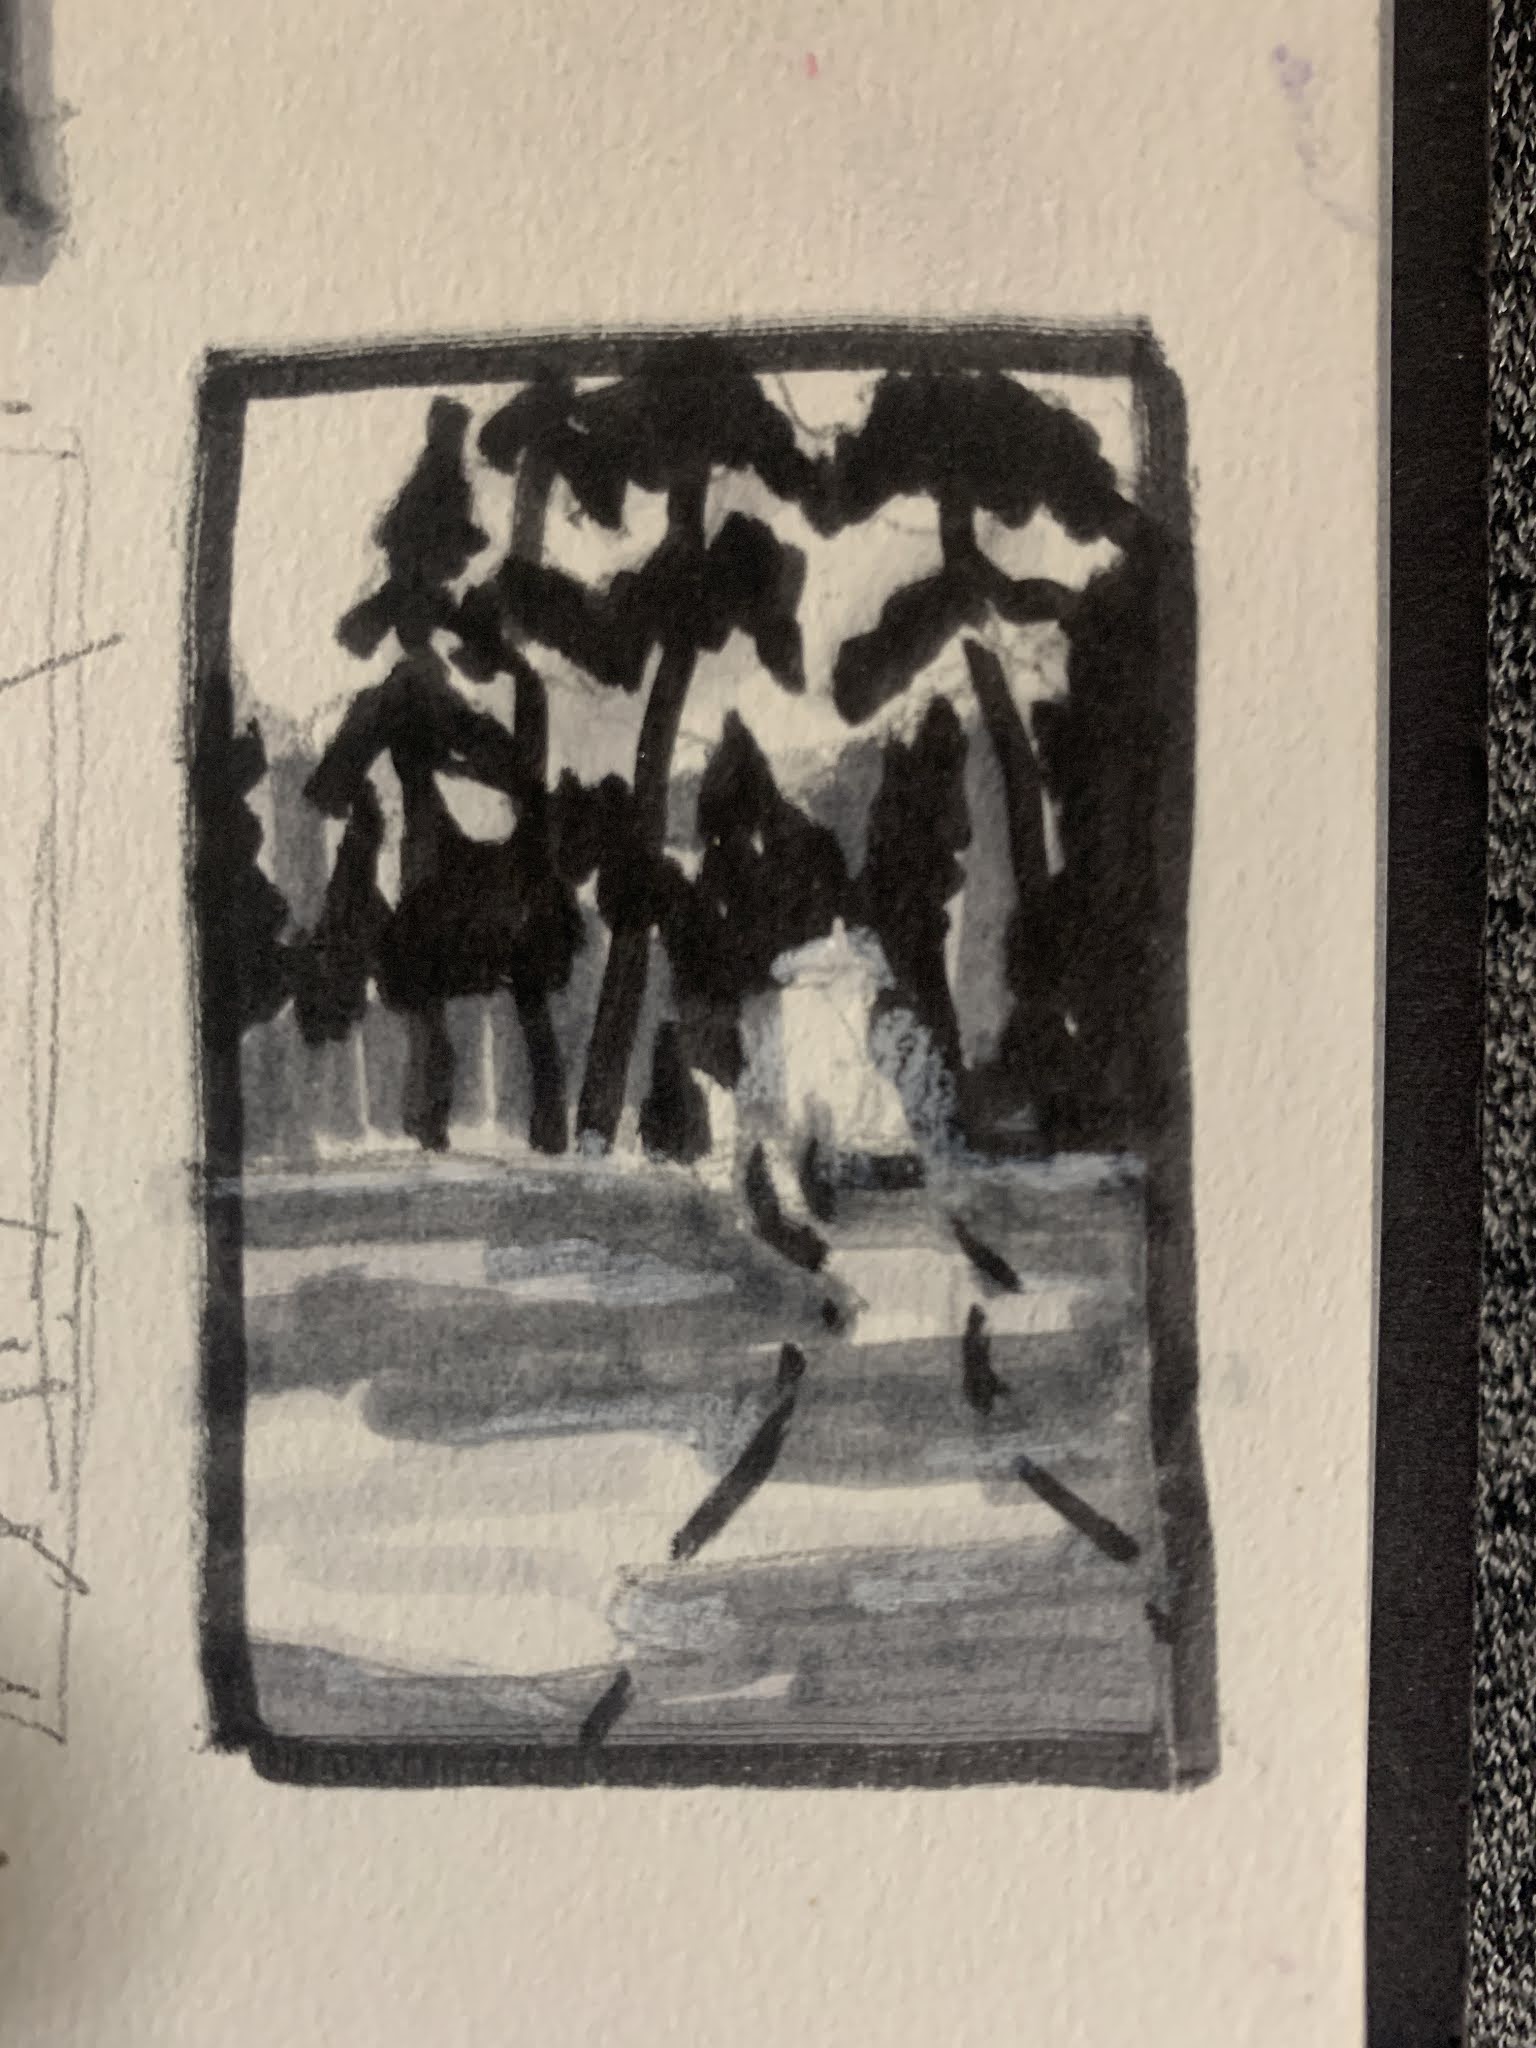
Next work out the values. I use a 4 step value process. White of the paper, middle light, middle dark and dark. I also use Tombow markers because they don't bleed through the paper. But, you can use varying pressure with pencil or  pen. At this stage I follow Carlson's guide to landscape painting. He designates values by planes. The planes are the lightest light is the sky, mid lights are the flat planes across the landscape, mid darks are slopes or mountains and tree shapes are the darkest dark. This value step showen above follows his guidelines. This lays out how I begin my painting and how to stay true to the values so I don't get lost. When beginning a painting I use this as my starting point. Not the Photo. The Photo used at this point is ONLY used as a reference for placement of objects. Keeping in mind that I may have moved shapes to make a better composition. 


Next I do a small thumbnail using this information and building on shapes and patterns. This may seem to have more detail but it really has only enough for me to work out basic information on the subject. I use this sketch to place my subject on the paper. I'm only concerned at this point that my shapes are correctly placed, that they are pleasing, and is my FP in the place I want it. 

Next I did an underpainting. I know where my values are so I was able to pick some inktense art stick based on value. I used two dark shades of purple for the darks, yellow and oranges for the lights and just a hint of blue in the sky. I wet with this a very inexpensive stiff brush and water. I started with the sky and the lights and then went into the darks. I used a controlled amount of water in each section. Sometimes I got runs but I did try to control this somewhat. I also let the colors mingle in places. When this was dry I had a very vibrant underpainting to work with. At this point, the only color decision I had made was the compliment color set up for the underpainting and identifying the lights and darks with it. Unfortunately, I did not take a picture of this. 

I did however start with my darkest cool darks in pastel and a very light touch started to identify these places. I chose next some basic colors of the scene and in the lightest light I used warmer colors to move into those spaces. One I identified that, I decided I wanted the sky to be a grey color. Here I layered in light colors (same value) blues and oranges to create a grayed down but vibrant sky. I did leave larger areas of underpainting showing to continue to guide me with color choices. 

As I continued through the piece, I let my intuitive sense take over and responded to color by its value, hue and intensity as I placed it around the painting. I know as things recede in a painting you have atmospheric conditions that cool color down, gray it and dull it. So when I addressed these areas I keep that in mind. I also know that complimentary colors vibrate when placed next to each other (even if they are grayed and dull). I love this about color.  I like my color to sing out, so I paint that way. I always have had a sense for that.  Some people have line, simple shapes and such that becomes your style. It does develop and we as artist just try to identify it and embrace it. 

Over all I think this painting is successful. I leave it up for awhile to look at and see if and where it may need corrections. I do study other artist I like and see how they have worked through their pieces. I think, if it worked for them, maybe I can try it. I try to avoid ambiguity in lead in lines. If something looks like a bad shape or unclear I fix it. I don't go over the entire painting. At some point you have to trust yourself. 

Happy Painting
Debi


Saturday, March 13, 2021

Painting what you see

Keeping it loose


Sketch, Sketch, Sketch everyday. You won't get better as an artist unless you learn to see. Sketching does that for you. Keep a pocket sketch book and minimal supplies with you even in your car. Sketch everything that interest you. Learn to see the colors in shadow and in light. Best advise ever! I wish now I had more sketchbooks filled than I do. 

Paint what you see...easy right? Well, not all the time. Take your notes while you're out, use the photo as a tool to help with color notes and values, but let free yourself once you get the bones of your scene down. Use gouache or markers to help you through. The more time you spend on preparing for the painting the looser your strokes, the less you feel like you have to copy what you see. The more you can feel free to change the colors and mood you want to portray.

I have multiple photos I can draw from that I have taken. If you truly understand the landscape then you'll be able to paint what you feel too. Remember to keep in mind that the camera sees the images as flat. It will make the darks look black and the lights will be light. If you just use it as a starting point of shapes and values, you can let your imagination free. It's so wonderful when that happens. Your paintings may take on an abstract feel to them. There are artist that love to paint photo realism. Their work is amazing, but if you look closely you'll be able to see where in areas they have taken the liberty to introduce dynamic color. 

So how do we get there?

  • Take the photo - thumbnail and frame it with a dark L shape mats to really pop out the area of the photo you find interesting. Remember each photo can have multiple areas of interest for paintings.
  • Find the horizon line and mark it with a marker. (I use 3 values of TomBow markers). Do the darks first. Then, block in the midvalue. Let the lights be the light of the paper. Use the main structures only in the scene for this. It's ok to cut parts out of the photo. Leave big uninteresting areas that scream for attention out. It's ok to not look at the photo. Try really hard to not look at the photo for any detail. Keep it simple. It's ok to cut the sky out if to much, and ok to leave large foregrounds out too. Very SIMPLE is key
  • With your markers draw a 2x3 box and work out the simple shapes only. Is the composition pleasing? When you have worked that out you can transfer it to the painting surface.
  • Block in the big simple dark areas. Just shade it in. No need to draw, your objective is to stay loose. use an old brush to wipe out some of the charcoal to show a value change if you want like I did on the side of the mountain. 

This was blocked in with wood charcoal

  • The example above was completed on a half sheet of art spectrum paper in gray. 
  • Remember, to paint
    •  Dark to Light
    • Light touch to thick strokes
    • background to foreground
  • Squint Squint and Squint again to see shapes and values. Do this throughout the painting process and step back often to evaluate 
  • Use broad strokes, light touch to identify local colors
    • Block in darker background trees or objects, use a mid value color to start with
    • Then move to background (far distance) 
    • Try out a sky color, when you find the color you want put that in. Make sure to use a light touch around the foreground tree shapes so you can add sky holes later
  • Remember to play down non focal area
    • Not important objects in the scene. Rule of thumb: If it doesn't help in the design it might not need to be there
    • Look at your edges. If they are not the focal point then they should be soften. Especially things sitting in the far distance. This will help to push those objects back further in the picture plane. 
  • Foreground treatment
    • Add a few bright colors to indicate where the values will be
    • Try out very bright colors in small bits with soft edges
    • Add brighter strokes on the horizon line to separate the planes visually in the painting
    • Use large and small strokes to help lead the eye into the painting
    • Try a little grayed color to the bright horizon line.
    • Try very little but, bright lights in the background trees. 
    • Use also, gray greens to balance color
  • Mark Making
    • It matters! mix flat strokes with line strokes in grasses
    • Short small minimal strokes in foreground

Rule of thumb notes

Water

  1. Light passages (like the sky)are usually darker in water reflections 
  2. Darker passages are lighter in the water (reflections or shadows)
  3. Start with lighter passages of the sky and soften the edges
  4. In the front of the painting go even lighter in some of the passages 
  5. Indicate foreground foliage colors with the water colors
Most of the picture should have the initial block in done

Putting it all together

Refine your painting. Check for;
  • brighter colors and smudged edges
  • touch up the darks


Wednesday, March 3, 2021

Drawing shapes: simplifying & line importance

Line and Simplify Shapes

We will talk more about shape identification, how to use that to your advantage. Also, we will start with the line shape and drawing it. We're not done with the photo either, there is so many things to say about it. I want to encourage you to work from life too. It is the very best way to learn to draw.


Lines

How does line help? Well, it will be the absolute first thing you put on your paper for design purposes. The concept of the line identifies the basic shape placements, how you lead the viewer through the painting, and your basic composition. I can't express it enough how important this concept is in composition. 

  1.     Rule: Line decides the composition in the most basic sense. It should be an uneven space devision.  Never forget this rule. Our brains are made in such a way that we unknowingly will space things even, but our visual senses like uneven representation of our visual field. This is a basic concept that is stressed in Carlson's Guide to Landscape Painting.  Every artist should have this book. Also, another book that I think should be in every artist library would be Drawing Scenery: Landscapes and Seascapes. 
  2. The first step would be to identify the horizon line. Remember to keep spaces uneven. Ask yourself; is this drawing about the sky or the earth? Then place your first line after you decide the frame of the picture (rectangle, vertical or square). 
The concept here is on how to divide your space and where to start. 

The next line could maybe represent a tree. The bottom picture represents how a line can stop the viewers eye from traveling around the picture plane. 


The idea here is to show you how a line can cause the viewer to stop. 

If this happens the viewer in this case has nowhere to follow through with the painting and will move on to another. The important concept to take away from this is how important lines are to create a pathway to leave and enter the painting multiple times. As you see in above photo the top picture design has more ways to enter the painting, but the bottom example is awkward for the viewer. 

This next example is the use of multiple lines that leave the painting edges allowing the viewer multiple ways to enter and leave a painting.


See how this example is pleasing to the eye? I would suggest that you explore the line concept with your references in the sketchbook. The more basic exercises you complete, the more it sticks and becomes a auto reflex of sort to make better paintings. Curves can be used to represent parts of the painting. I would suggest No Values should be explored at this stage, Only how the lines can direct the eye. This is a foundation piece to good drawings. We must learn to crawl before we can run. 


This is just an example on how lines might work, both complete to all edges and incomplete. Since this is about the sky we could dissect this as the horizontal lines maybe be a pathway (river or road) to the red line. So the FP could be that object (house, tree, sign or telephone line). The dark lines in the sky could of course be clouds or even just a color change. See where I'm going with this? Lines can be curved too. Just a simple suggestion is all that's needed. This could be a very busy scene for a first painting so I would suggest something much more simpler from your reference photos.

Keep it really simple


Here is the photos that the line concept above represent.


Shapes

Shapes are simply the overall design of the landscapes. Shapes can also be described as the bones of a painting using the line concept.

How do I identify shapes? A good way is to turn your photo to black & white to help identify these shapes. You'll be looking at value (is it light, medium or dark)? How do these shapes connect? Is there blurred area where the shades melt together? That's what you are looking for. Example might be this landscape

Squint your eyes and see the large shapes.

Notice the green shapes are in the foreground and appear very dark. There also is two shapes in the background that are pink.


 Let's review the green shapes first. Every photo makes the darks appear darker than what they would be in real sunlight. They are on the same plane in this photo. Lets look at planes in a photo. Well, what in the heck does that mean? Planes are divisions that depict where objects sit as they recede back in space. This helps to create a 3D effect on a 2 dimensional surface.

The pink area is the foreground, the green is the middle ground and the orange is the background. The sky and river have their own shapes too, I just didn't identify them in this photo.

It looks like we have 4 big shapes. But wait, the green areas are not connected well. See how we can connect them with that sliver back by the thin area of red shape? We could use that shape to connect the greens together. That gives us one big green shape.


The blue areas mark similar light values (lets give it a 3 on a value scale)we might want to consider for this painting. We may also decide the blue value of the river is a step down in value (4). Then red designates the darkest value (value of 7) with the green areas the next value 5or 6. Since the green areas are darker  but not as dark as the red shape of the tree line. The orange area is for us to remember this is the furthest plane away from us and must be treated as a value lighter that the foreground. It's another concept to learn (arial perspective) which we will tackle in another post. Just remember things get lighter and duller as they recede in the landscape. 

This might seem all too much, but look at your references and try to pick out the large shapes, squint and connect the shapes where you can. Identify the planes. Value and color choices will depend on these. Try blending the green shapes together. Make a notan of 3 shapes. Does that look pleasing to you? Use light, medium and dark marks to see. In this case I would first make the sky and river separate from the earth. Then try to pick out the dark in the earth area. Thats part of the bones. Review my notan post as this discusses this concept with photos to help you with understanding. 

Your goal is to simplify your shapes. If you succeed in this it will make your painting process more intuitive because, you have worked out all the hard stuff first. This equals less frustration and more fun. 

We'll explore this simplifying more in my next drawing post. Until then keep practicing in your sketchbook, plain paper, napkins whatever works for you to draw. spend 15 minutes on it every day. Pretty soon it will be automatic and then you'll be able to see it without having to do the exercises. It's a wonderful feeling when that happens. 


Sunday, February 28, 2021

Drawing

 Drawing and interpreting your scene


What do we do with that photo! That is a great question. A photo can supply you with multiple scenes within a scene to choose for painting. Cropping is key to make this happen. You certainly can copy the photo as a whole, but what fun it would be to find other areas within the photo to make a painting with it. 

Now you have a sketchbook and value view finder lets put it into use. 

What do you want to say

What is it about this photo that attracted you to the scene? Was it the light and shadow pattern? What made you stop and take this picture? What is my focal point? 
    The Focal Point? What is that?
  • A focal point is what you pick to be the main area in a painting that you think is the most important part you want your audience to focus on or relate to. 
  • Next, is where in the format do you want this Focal Point or FP to be placed in the space of your format.
  • A format is the rectangle (in the landscape or vertical frame) or the square.
This is where you start. Typically we will begin with a rectangle and divide your box into thirds like so. This is done in any format you choose.


The 4 circles represent where your focal point might be placed. This grid may also serve to help you with the placement of objects within each square for better drawing accuracy. A photo should at the beginning  be in a black and white exposure to help you determine the shapes of your idea. Here is an example of what that may look like


As you can see I changed the photo to silver tone, placed my grid and identified where my FP will be placed. I also used the L's to breakdown this 4x6 photo I took to a smaller area within it. It is useful at this point to place your idea of this format in your sketchbook. Try and draw a likeness of what you see, making sure you follow the values with your drawing. Remember; not every attempt will be successful. This is true with every artist. Sometimes, we have to abandon ideas until we gain more experience. This is normal. Don't be hard on yourself. Check out my bookclub on drawing. Most of these books are available on Amazon. Draw using this process for multiple objects around the house inside and out. All things are paintable, don't get caught up with trying to find something to draw. Just use any picture or item laying around. (I would stay away from portraits at this point, including pets). However, if you want to do an exercise in placing them within a landscape, don't include detail. Our goal is to look at shapes not things.  The next most important concept is Make no two shapes the same. These two things will be true throughout the painting process no matter how experienced you are.

Next Time

We will talk more about shape identification, how to use that to your advantage and why its important. Also, look in my labels for information on notans. Also, we will start with the cylinder shape and drawing it. We're not done with the photo either, there is so many things to say about it. I want to encourage you to work from life too. It is the very best way to learn to draw.

Wednesday, February 17, 2021

Thumbnails

  • What does the thumbnail tell you?
    Thumbnails can hold so much information for you. They are your roadmap for a painting. By doing thumbnails you are creating pathways to be successful in your paintings. Lets face it art is expensive. Paper or Canvas isn't cheap so it becomes precious. The main way to reduce failure is to practice and plan everything out so you are successful. So how do you do this? Practice!!  ðŸ˜‰
     I hope to explain to you my journey into the drawing process. Give you tips on subjects that they don't tell you in books, but are tricks every artist uses from time to time to be successful in a subject that they may not be so familiar with. Some of the most successful artists today have been former Illustrators and have years of practice and college training. If you can start in a junior college, take all the art classes you can. There is so much to learn from the History of Art. Visit museums and study from the Masters in history, you will often see students sitting and drawing or painting in the museums with permission of course. Copying their (The Masters) works. You shouldn't try to sell these, but can give them away to friends and family. It's an ethical thing. At the very least you should give the original painter or photographer credit. But the experience of copying them enlightens you with so much "Aha" moments in drawing, color mixing and composition you can't help but come away with knowledge. 

    A note on today's Artists, if work is done in practice workshops as long as the artist gives you permission to post your work you may. It is not excepted practice to post those pieces for sale in a public domain atmosphere or enter a competition. However, this is a very deep and talked about subject for another post. Just keep these key points in mind before selling your work. As long as you made the drawing, your picture and your rendition of the scene, you will not be infringing on any other artist. 

     Here is an example of a copy of work I've completed. This is originaly a work from 'Edgar Payne called "Morning Light". I won't sell this, I could give it to family though. This held a great amount of information on how to handle greens and his composition decisions for me. This also was started as a classroom study of the Masters. 

18x18 pastel

Notice in the left lower corner my signature and copy of Edgar Payne, even though copyright laws have expired it is highly recommended to give the original artist a nod. This painting will never be for sale, however I may frame it for my personal use. 


Edgar Payne's "Morning Light"

  • What are my main shapes?
    Identify the main shapes of your composition. Try different formats of these shapes to see if they are pleasing to you. 
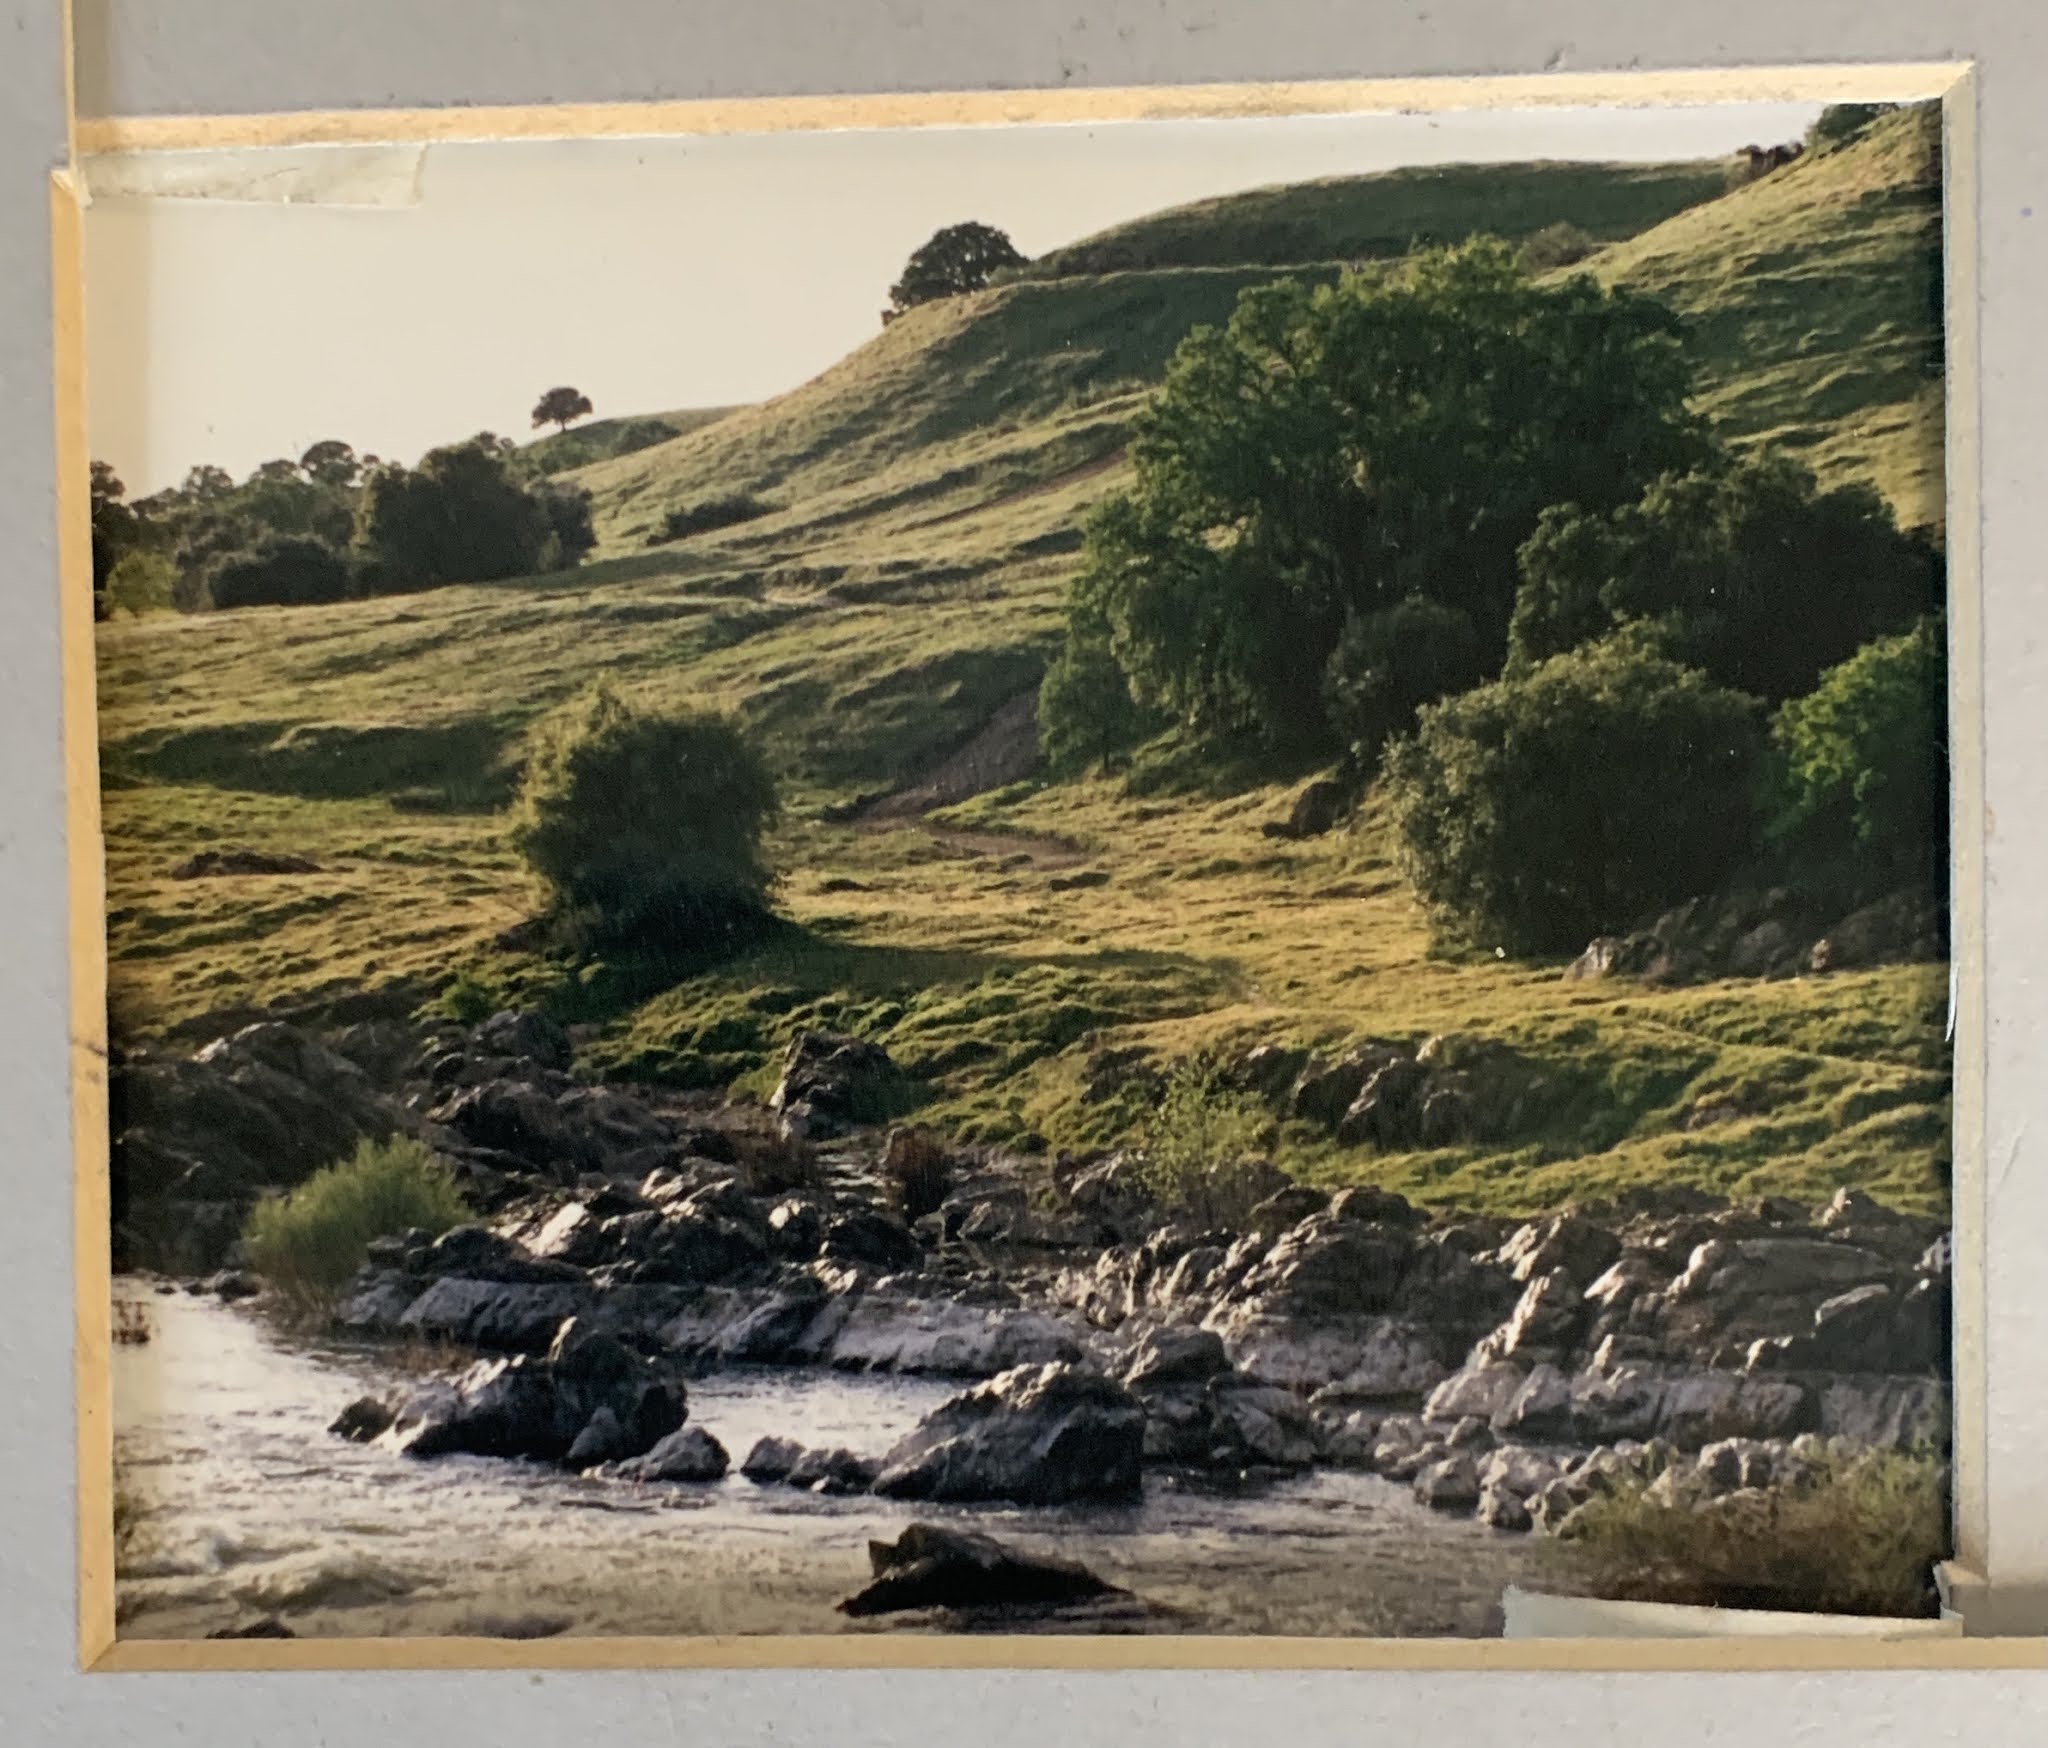
    Here is a photo I took many years ago in Knights Ferry California. Not that great of a photo but it has potential for many compositions. 

original photo

These following pictures are possible format and shape identification possibilities, to consider.


    So you can see how 1 photo can become more paintings. I did try different ideas of color for the first example. They are so different as I explored this idea. These were done on Canson paper because I wasn't concerned about a finished painting. Remember, Canson paper does not hold many layers of pastel marks. It's ok to stay with a light touch especially with soft pastels since they tend to deposit thicker deposits of pigment on the paper. I like to use it to identify in color light and shadow areas. I also like to try different background colors for effect. On this particular example I used a green leaf color paper, but could have used red as a compliment just as easily.


8x8 pastel


    Next time we'll talk about using the photo verses life, it's advantages and disadvantages. I'll share with you the process of making this little study. I hope this is helpful for you. There is so much to say that I don't want to cause confusion. I'll try to give this to you in steps that flow. I know your probably anxious to get going. Please refer to the book club for suggestions in books of drawing that directly relate to the information I am sharing. This will get you going as we go through the subjects to help you to get started. Practice and Practice in your sketchbook will help you get where you want to be with greater satisfaction quickly. 

    Please follow me if you like this blog and sign up with your email so you get notifications as I post new content. Thanks again. Let me know if you have questions on this subject or if you want me to talk about concepts you think may be helpful. Have a wonderful day. 😀

Debi


Tuesday, February 9, 2021

Prepping for the painting

 Painting prep

First and most important there are NO RULES in painting. There is however, suggestions to help become successful with your paintings that have been discovered in our Art History. There is known pleasing design concepts to keep in mind. But you are the artist and you are in charge. Keep in mind the suggestions but you are not married to them. Give yourself freedom of expression in your work.

When preparing for any painting, it is wise to do the prep. Some artist who are familiar with painting and have been doing it for awhile skip these steps. That's ok. They have the experience to draw on to make it work. But, as beginners DON'T skip this part. This is where that sketchbook will become your best friend. Don't be afraid of failing in a painting, it will happen! It happens to even the best of the best. Sometimes we need several tries to figure out how to express what we see on paper. Don't worry about your style (mark making), it will come. You will create your own as you learn from others and practice. We want to create a habit in sketching. All successful people spend time practicing their field.


Reasons to sketch

  • Where to start?
You guessed it, sketching! Lots and lots of practice. I find the more I ponder over a painting the easier it is to actually do the painting process. Also, you will set yourself up for more winners than failures. Prep always, always, always paves the way to a more intimate connections with the subject matter. Who says you only need to paint something one time. The more familiar you are with the subject, the more expressive you can become with mood, mark making, abstraction or realism. As beginners, we want to depict our subjects as we see them with increased detail. This is normal. Eventually, you will want to branch out further and maybe move away from realism, this is normal too. Some will move to hyper realism and that's ok. You have to start somewhere (A Marla-ism).
  • Why was I attracted to this scene?

Why do we paint what we do? Do we have a fondness for the subject matter? Was it the light and shadow patterns? Was it the colors that grabbed us? These are all important questions to ask our selves before we paint. By answering those kinds of questions, we are already making decisions on how to paint our subject. Here is an example of a photo I took a very long time ago in California. I have taken the mat from a 4x6 and cut it in 2 corners to form 2 L shape mats. This is used to crop the photo into different areas within the photo. Why? In most photos of the landscape you can find at least 2-3 (maybe more) paintings or scenes you'd like to see if they can become a painting. A more in-depth look into photo use with art work will be in another post. But for now lets look at what we might use to help us get started.

This is the original photo 4x6


this is the cropped version of a potential pleasing design option

What is the reason I might like to paint this? The attraction for me in this cropping is the morning light and the tree bush design. Can I make this work? I don't know. Lets break this down and see. I did spend some time with thumbnails on this cropping of the photo.

  • Is this about the sky or the earth? (For Landscapes)
Is your subject about the sky? Is it about the earth? Is it a still life or portrait? This gives you direction on how to divide your subject matter within the frame you choose. Richard McKinley (Master Pastelist) always teaches this concept. Discussions on dividing spaces will be presented in greater detail under composition. 

For me this photo above is about the earth. As you can see above, I have very little sky in my cropping. This idea may look something like this. In each format rectangle, square or vertical I have taken the very basic shape and placed it with the sky dominate or the earth dominance. It is up to the artist how they want to express their painting. Or, they could try all formats in quick thumbnails to see which they like the best. This helps to familiarize yourself with the subject and become intimate with it. 

Possible formats of dominance of the sky or earth


  • What format do I use?
Is it a rectangle, vertical or square format? This is when you start making decisions with thumbnails. A view finder is VERY helpful if on location. L shape mats help to narrow down areas in the visual field or on a photograph. Try sketching in different formats what  you want to say. How well does your shapes fit into the format? Do the shapes have an easy flow to them. Here is possible options.

Format and Value options

I have taken the basic shapes important to the design and using the notan idea, flipped values around to see if any catch my attention more than others. These are possibilities left to the decision of the artist. None are wrong. Some just look better than others. 
The Notan.  Notan is a Japanese word that means "light-dark balance. It is an arrangement of shapes in the simplest form. To artist it is a way to explore the elements of design without having the distractions of color, texture and detail while designing the potential painting.
This is the most basic shapes of the photo above. I placed it in a square format to try for this study.

Basic Notan


Well, that's it for this post. More on Notan's and Photo use in your work to come. Don't forget to subscribe by email to get notifications of new posts. 

Thanks again, If I ever get the like button working (hopefully soon) we can use that. My brain is wired on the right for artwork and technology is left brain. But, I'll get there.

Have fun and sketch!!! If you do a little each day in 6 months you will see significant improvement. Start Today. 😉

Saturday, February 6, 2021

Drawing basics

 Drawing & the Sketchbook

Sketchbook thumbnail of trees in the backyard


Why a sketchbook

Drawing is an important concept to understand. No, drawing doesn't need to be exact in your future painting process and may represent such areas like painting abstract, impressionistic or Amine etc. But, you do need to understand form, spacial aspects of your subject and perspective. Especially if your goal is drawing or painting 3D on a 2D diminutional surface. You can dive very deeply into this subject and start producing phenomenal pieces of art. You can also understand these basics to produce paintings that may be similar to artists like Picasso, Piet Mondrain, Edgar Payne, Monet and others. Its up to you how far to go. This blog is not meant to replace the classroom, but will help to guide you in your journey to produce better paintings.

My suggestion is to start drawing in a sketchbook and make it a habit. If you do this and dedicate just 15 min a day you will improve your drawings and paintings 10 fold. 

Tools

Sketchbook 5x7 or a square 8x8. Binding method of your choice. I like the spiral bounds the best, but I have both. Carry these with you everyday. They make pocket sketchbooks too. Draw everything you see. I know I use to spend time telling myself  "I don't see anything to draw". Everything even as simple as your dinner plate and glass to a more complicated piece like a tree. I have seen very unique subject matter drawn and it looks really good, maybe not always a painting but lots of fun. 


Pencils -  HB and a B to start. 
  • The differences for these are the HB is a harder lead and B is softer for shading. I use the HB for getting in the shapes I want and B for pulling out the form. You can also use an everyday ink pen and achieve the same results.
  • 3 shades of Tombow markers (found in most art stores) I use browns and grays. I like them because you can suggest form in your sketchbook studies without the marker bleeding through to the back side of the paper. I'm huge on savings, art has the potential to be very expensive.
    • Browns I use are numbers: 879,977 and 990
    • Grays I use are numbers: N15, N55, N75
  • A plastic box to hold your supplies
  • kneaded eraser and a white eraser
  • 3" ruler metal
  • X-ACTO knife for sharpening
  • Value scale tool. Dan Rankin has one with a built in view finder that can be helpful in the beginning. Certainly can make your own by taking a mat frame (from any framing area in a hobby store) and cutting t
  • 2 opposite corners to make L shapes. You can make the L's from any size mat you want. I suggest smallest. 


Now lets start drawing! 😊


Introduction

Introduction

 Hi  I'm Debi.  I wanted to start this blog along time ago, but I just didn't have time with work and life. Now, working part time I...